I normally don’t share many dessert recipes, but that is because I don’t often make dessert. My husband and I don’t really like most sweet foods, and while the kids would probably eat dessert whenever we serve it, we try not to have sweets very often and to focus on quality proteins, vegetables, and fruits instead.
This recipe was born because I was trying to create a vanilla cake recipe that I loved and could use for making a friend’s baby shower cake.
The kids were, of course, willing taste testers, but I knew the cake was a winner when my husband liked it too. He isn’t a dessert guy at all, and the only dessert he will normally even eat is chocolate chip cookies, so the fact that he raved about this cake was a big deal.
Vanilla Gluten-Free Cake Recipe
This recipe is grain free, gluten free, and dairy optional, with a coconut and almond flour base. It does use some natural sweeteners, but is free of refined sugar and food dyes.
Even though this would fall in the “healthy” spectrum of desserts, this is absolutely not an everyday recipe! Another favorite occasional recipe around here is my Mocha Swiss Meringue Buttercream Frosting.
As good as this cake was, a better option would still be a protein packed meal with some fresh fruit for dessert, but if you feel like splurging, this is a good alternative to most other cakes!

Vanilla Gluten-Free Cake Recipe
Servings
Ingredients
- 1 ⅓ cups coconut flour
- 1 ½ cups almond flour
- 1 ¼ tsp baking powder
- dash of salt
- ¾ cup coconut oil or butter melted
- 1 cup coconut sugar
- 1 ½ cups homemade almond milk or coconut milk at room temperature
- 2 TBSP vanilla extract
- 9 eggs at room temperature
Instructions
- Preheat the oven to 350°F.
- Lightly grease and cake pans using a small amount of coconut oil.
- Mix together coconut flour, almond flour, baking powder, and salt and set aside.
- Beat the melted coconut oil/butter, coconut sugar, almond/coconut milk, vanilla, and eggs for about 2 minutes or until well mixed and fluffy.
- Slowly add the dry ingredients to the wet ingredients as they continue to mix. Mix until well incorporated.
- Spread into two round 8-inch pans (if not making a layer cake, you can also make as cupcakes or a 9×13 cake. It makes about 24 cupcakes).
- Bake for 30-35 minutes or until firm to the touch in the middle (if making a 9×13 cake or cupcakes adjust time up or down accordingly).
- Remove from heat and let cool completely before frosting.
- Frost with buttercream (if desired- see recipe below) and cover with fondant (completely optional).
Nutrition
Notes
Buttercream Frosting Recipe
Again, this cake doesn’t need frosting, but if you want to add frosting, this recipe turned out great:
Ingredients:
- 1 cup butter
- 4 cups powdered sugar or coconut sugar blended in a high powered blender to powder it
- 1 TBSP vanilla extract
- 2 TBSP heavy cream
Instructions:
- Beat the butter for 2-3 minutes or until fluffy.
- Add the sugar and other ingredients and beat for an additional 1 minute or until completely smooth.
- Use icing right away.
Fondant Frosting Recipe
We used this purely for decoration since the texture was great but it was too sweet for me! You could add natural food coloring to this to make any color you want for decoration.
Ingredients:
- 2 (7 ounce) bags of organic marshmallows
- 2 TBSP water
- 2 lbs powdered sugar
- coconut oil for hands and counter top
Instructions:
- Place the marshmallows and water in a microwave-safe bowl or double boiler and heat until melted.
- Add most of the powdered sugar to the melted marshmallow mixture and mix with a spoon or the kneading hook on a mixer for 1-2 minutes or until well incorporated and thick.
- Add some of the rest of the sugar and mix again.
- Grease hands with coconut oil and knead the icing until smooth and elastic.
- Refrigerate for a few hours (optional) or roll out using a rolling pin. Carefully drape over cake, or use knife or cookie cutters to cut desired shapes.
Pulling it All Together
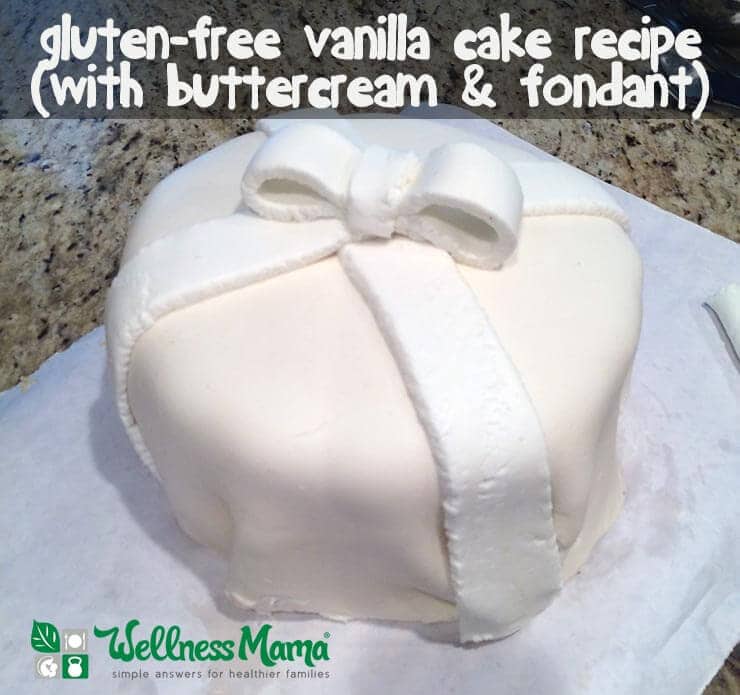
Personally, I preferred the cake by itself with some fresh berries on top, but if you are making for a special event and want it to look more fancy, this is what I did for the picture:
- Let cakes cool completely. Place one on a flat baking sheet and ice with a thin layer of buttercream on top.
- Add the second layer of cake and ice the top and sides.
- Roll the fondant into a thin (1/8-1/4 inch) layer and placed carefully on top of the cake. I wanted more of a draped look, so I let the layers fall as they naturally did.
- Cut a “bow” out of the remaining fondant for decoration, but you could use any shape for this.
Ever made a (somewhat) healthier version of a treat?


Leave a Reply